Some of my favourite recipes:
Here are a few recipes I make again and again for family and friends. They're in no particular order so just scroll down the page: desserts--mostly tarts and cookies-- are the focus for the moment, though there are a few savoury recipes toward the end. Eventually I'll collate them into a more organized form but until then, have fun looking through them as is. Enjoy! Wendy

Mulled Wine (with alcohol-free option)
A taste of Christmas without the booze! Fill your home with the warming spice scent of the holidays with this cozy recipe for mulled wine, alcohol optional.
Ingredients:
2 cups apple juice
2 cups muscadine grape juice
2 cups Pomegranate juice (can replace with tart cherry juice)
1/3 cup of dried elderberries
3 sticks of cinnamon
5 cardamom pods (crushed)
3 star anise
2 allspice berries
10 cloves
1 inch fresh ginger sliced
2 medium oranges sliced (can replace with dried orange peels
1 cup dark cherries or mixed berries fresh or frozen (strawberry, blackberry, and blue berry)
Optional alcohol pairings: 1 bottle red wine, dry or sweet depending on your preference. I use a shiraz for oomph and find the alcohol-free shiraz now available in NZ work well for this kind of recipe or you can use a shot of oxymel* per mug.
Method:
Add spices to a large pot and slightly toast them to open up the flavors and aromas. Then add your juices and add in wine or oxymel.
Add in the fruits and bring to a simmer, then reduce heat and allow to simmer for at least an hour.
Alternatively you can place everything in a slow cooker and let it simmer all evening as folks gather.
Taste test the brew, and enjoy!
*What is an oxymel?
Oxymel is a syrup made from raw honey and vinegar with optional rosehips or herbs. I like to make one with rosehips from the garden because they're super high in vitamin C and the vinegar draws out their nutrients. Begin this recipe at least a week before you need it.
Rosehip oxymel recipe:
Ingredients:
100 g raw honey, unfiltered and cold extracted. I use thyme honey which has added benefits of the herbal goodness, but you can use whatever raw honey you like such as manuka.
100 g raw apple cider vinegar unfiltered and unheated
50 g Rosehips
Method:
Wash rose hips, remove stems and brown caps.
Put all ingredients in the blender and blend well on high speed. This helps to release the potent nutrients from the rosehips.
Then pour the mixture into a sterilized canning jar and seal airtight.
Let sit for one to two weeks in a dark place.
Now strain the rosehip mixture through a fine sieve. To do this, squeeze the mixture against the sieve with a tablespoon. Collect the finished oxymel in a sterilized jar.
Unopened, the rosehip oxymel can be stored in a cool and dark place for about 1 year. After opening, it should be consumed within 6 months. When opened, it does not need to be kept in the refrigerator.

Lavender, Chamomile & Rose Spritz
A taste of summer! The weather is warming up which makes me yearn for garden parties, warm summer patios, and afternoon get-togethers where you want to serve a beautiful drink without indulging in a full-out bubbly buzz. Whether you add any alcohol is up to you; this recipe is delicious as is, though feel free to add some sparkling wine or gin to it. Even without alcohol, this recipe has a calming effect that leaves you centered and relaxed after a stressful day.
The herbs and florals are inspired by what's growing in my garden at the moment and they have anti-inflammatory and anti-viral properties to boot!
You could certainly add or swap elderflower, hibiscus, or even a bit of lemon verbena, though I recommend tasting as you go to make sure the flavours all go together (maybe before you add any alcohol or you'll end up like my aunties back in the 1970s 4th of July picnics--a bunch of lovely Scottish redheads who could not handle their booze and were for some reason the official tasters of the whiskey sours!)
It’s a refreshing cocktail or mocktail that is half mineral water, so it will help keep you hydrated as the days become hotter.
Ingredients:
2 teaspoons dried lavender
1 cup boiling water
2 teaspoons maple syrup
1 cup chamomile tea, brewed for 5 minutes, chilled
1 cup rose tea, brewed for 5 minutes, chilled (when my fragrant roses aren't in blossom, I buy edible roses from a Persian shop online and you can also find edible roses at specialty spice shops)
juice of 1 lime (or more to taste)
1 cup soda water
ice cubes (you can freeze edible flowers inside the cubes for an extra pretty touch)
edible flowers for garnish
Method:
Pour boiling water on dried lavender and then stir in the maple syrup. Let it sit for an hour, then strain and cool. In a jug, combine the lavender infusion with the other teas, lime juice, soda water and ice. Give it a try. Feel free to add more maple syrup, lime juice, or soda water to taste. Get out your fancy glasses, serve and garnish with edible flowers. Enjoy!
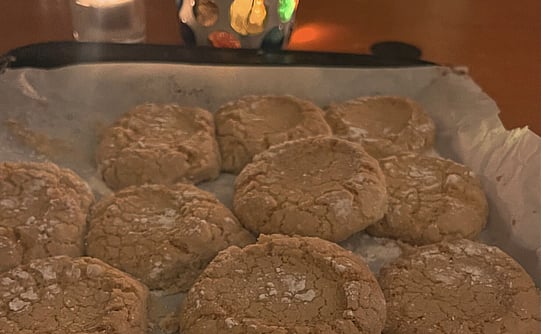
Ricciarelli Chewy Almond Cookies
Ricciarelli are dense, chewy Italian almond cookies originating in Siena. They are a distant, and much less fussy, Italian cousin to the French macaron — perfect with tea or coffee.
Ingredients :
2 egg whites
1 dash lemon juice
2 1/4 cups almond flour
1 3/4 cups powdered sugar
1 pinch salt
1/4 tsp baking powder
1 tsp orange zest about half a large orange
1 tsp almond extract
1 tsp vanilla extract
1/2 cup icing sugar for coating cookies
Method:
1. Preheat oven to 190C/170C fan/ gas 5.
2. Whip egg whites and lemon juice together with a stand mixer or hand mixer until stiff peaks form.
3. Using a sieve, sift in almond flour, 1 3/4 cups icing sugar, salt, and baking powder and fold into egg whites. I don't do it all at once but in 2-3 batches. Try to keep some air in the egg whites, but at this point it will form a pretty sticky dough rather than a fluffy meringue. Add orange zest, vanilla extract, and almond extract and fold in until combined.
4. Line a baking sheet with parchment paper. Using clean hands, roll dough into balls about 1" in diameter, then roll in powdered sugar until well coated. Shape into an oval or round shape, then arrange on baking sheet with some space between them for spreading, and flatten slightly.
5. Leave at room temperature for about an hour or until the tops have dried out and formed almost a little shell. (This may take longer in humid areas.) Pre-crack the shell by squeezing the cookies slightly from opposite corners. (Not doing this won't affect the taste, but pre-cracking them makes them much prettier if you want that beautiful white-gold contrast!)
6. When the cookies are ready, bake for about 20 minutes. Cool and store in an airtight container. These are even better the next day and are great with coffee or tea!
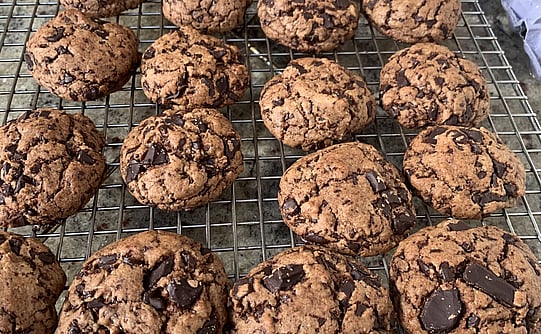
Chewy Chocolate Chunk Salted Caramel Cookies
These perfect chewy chocolate cookies are so good: slightly chewy, beautiful caramel flavour from browned butter and the added caramel (if you choose to add that; optional), and a slight crunch with big chunks of chocolate for your teeth to sink into. They don’t look chewy though, do they? And the ingredients (egg whites, almond..) bring to mind Italian biscotti. Don’t be fooled! They are, in our humble opinion, the perfect chocolate chunk cookie.
You can add the caramel if you want an added flavour and just half the chocolate.
Ingredients :
100g unsalted butter
225 g brown sugar
2 egg whites, whisked to near stiff
1 tsp vanilla
125 g almond flour
75 g self-raising flour (or gluten-free)
250 g 72% chocolate chopped or chips
Ingredients and method for the caramel:
45g unsalted butter + 120 g caster sugar
50 g thickened cream
40 g golden syrup
Make the caramel: add all the caramel ingredients to a heavy-based saucepan on a medium heat, stirring occasionally. As the butter and sugar melt down, stir more frequently to retain a homogeneous mix. Keep cooking, stirring intermittently, on a medium-low heat for a half-hour or more or until the mixture has become very dark and reduced by half (the technical term for this is ‘hard-crack’ (149°C-154°C); the caramel may cook more quickly depending upon what type of hob you use. Remove from the heat and pour the caramel onto a lipped baking tray lined with baking paper. Spread with a metal spatula. Allow the caramel to cool to room temperature, then put in the fridge overnight to harden.
Method for the cookie dough:
1. Melt butter in small saucepan over medium heat
2. When butter is almost boiling, reduce heat and cook slowly, stirring often, until it is beginning to brown and smells nutty. (5ish minutes)
3. Pour butter into large bowl and add sugar. Mix well and allow to cool. (5-10 minutes)
4. Add the whisked egg whites and vanilla and whisk well. Add flours with a spoon. The batter will feel wetter than other cookie doughs but don’t worry.
5. Add chocolate and caramel (if adding) to combine. Refrigerate for 1-2 hours or up to 2 days. Or if you can’t bear to wait, chuck the dough in the freezer until hard enough to roll.
6. Preheat oven to 180c and line a baking tray with baking paper.
7. Roll the dough into balls of equal size and arrange on tray, then press down lightly to flatten.
8. Bake for 10-12 minutes or until they are beginning to turn golden. Be careful not to overcook them unless you like them super crunchy.
Adapted from a recipe in ‘The Shared Table’ by Clare Scrine; caramel recipe adapted from Leed St Bakery Jack O'Donnell's Salted Caramel Cookie recipe
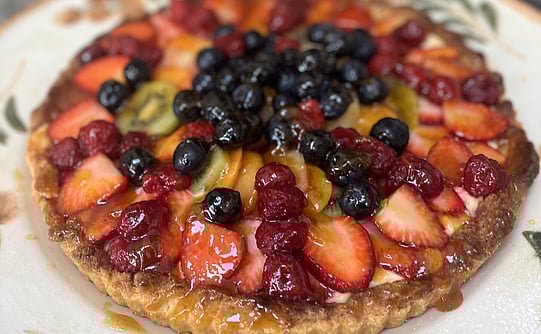
Fruit fruit tart with vanilla custard
I make this French fruit tart every year in November for my daughter’s birthday. In New Zealand, late November marks the month when we start getting lovely fruits and fresh blueberries, strawberries and raspberries, but you can also make this with frozen fruit (though it’s not quite as nice).
It’s inspired by pastries in Paris that dazzle in the windows of fancy patisseries, with a glossy apricot glaze, buttery shortbread crust, luscious vanilla custard, and a vibrant mix of fresh fruits.
NOTE: It's best to start this recipe a few days before serving so you can make the tart crust and custard beforehand, then just assemble the tart right before serving.
Servings: 10
Ingredients :
1 recipe pâte sucrée (sweet tart dough: I use the one from the lemon tart, below)
2 cups whole milk (do not substitute low-fat or skim milk)
½ cup sugar
3 tablespoons cornstarch
1 large egg
2 large egg yolks
3 tablespoons unsalted butter, cut into pieces
2 teaspoons vanilla extract
About 4 cups fresh mixed berries of choice, plus other fruits, such as sliced kiwi or mango (see note)
¼ cup apricot jam
Method:
Make the sweet tart dough at least one day before, press into a disk wrapped in plastic and place in fridge. Roll out the next morning into the fluted tart pan and place in fridge for at least 5 hours. Putting the pastry in the fridge really keeps it from shrinking when it cooks! Blind bake the crust by placing baking paper then a layer of uncooked rice on top during baking. Once the crust is out of the oven, let it return to a cool room temperature before filling.
Make the Pastry Cream: In a medium pot, heat the milk until just boiling. Remove the pot from heat. While the milk is warming, in a heat-proof mixing bowl, whisk together the sugar, egg, egg yolks, and cornstarch. Whisk until the mixture is very smooth and has lightened in color, about 2 minutes. Whisking constantly, add about a quarter of the hot milk into the egg mixture. (This is called tempering. Tempering the eggs helps raise their temperature without cooking them, and helps emulsify them into the milk.) Pour the milk-tempered egg mixture into the pot of the remaining milk. Whisk to combine.
Return the pot to the heat and cook over medium heat, whisking constantly to prevent “scrambled eggs,” especially on the sides and bottom, until the magic happens and the pastry cream thickens, about 2 minutes. Stir in the butter and vanilla and cook one minute more, whisking constantly. The pastry cream should make thick, lazy bubbles.
Pour the thickened pastry cream into a clean, shallow bowl. Cover it with plastic wrap and push it down in the bowl so it sits directly on the surface of the pastry cream. This prevents a skin from forming on top. Chill until cold, a few hours (or up to 2 days before serving).
Assemble the Tart: Remove the tart ring and transfer the tart shell to a serving platter. Whisk the chilled pastry cream until smooth, then spread it evenly into the tart shell using an offset spatula. Arrange a generous amount of fruit over the pastry cream in your desired design.
In a small saucepan, heat the apricot jam with 1 tablespoon of water over medium heat, whisking, until thin. (Alternatively, heat it in a heat-proof bowl in the microwave for about 30 seconds.) If the jam is especially chunky, strain it through a sieve. Use a pastry brush to gently dab the fruit with a thin layer of apricot glaze. Chill until ready to serve.
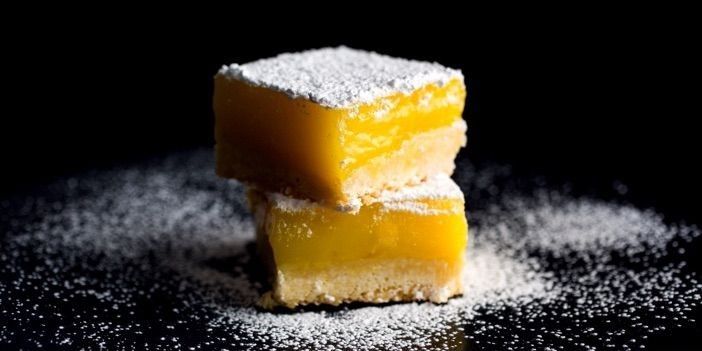
Whole Lemon Tart
This recipe comes courtesy of my mom in Pennsylvania via the NY Times food writer Doris Greenspan. (Lucky me: my mom sends me hard copies of the NY Times magazines and the book reviews every week! I love the food column with a different contributor each week). Prior to discovering this recipe, my mom and I always made lemon tarts the traditional way with a cooked custard filling. This one is SO much easier! You just throw all the filling ingredients in the food processor and voila!
Adapted from “Paris Sweets,” by Dorie Greenspan.
Yield 8 servings
Time 1 hour, plus cooling
Ingredients
1 partly baked 9-to-9 1/2-inch tart crust in a pan with a removable bottom (recipe below)
1 lemon, scrubbed and dried
1 ½ cups/300 grams sugar
2 large eggs, at room temperature
3 tablespoons/24 grams cornstarch
4 ounces/113 grams unsalted butter (1 stick), melted and cooled
Confectioners’ sugar, for dusting
Sweet Tart Crust
Yield One 9-to-9 1/2-inch crust
Time 45 minutes, plus chilling and cooling
This recipe, a trusted go-to, is sweet, golden and more crisp than flaky. Typically French — it’s a pâte sablée — I use the recipe for my whole lemon tart as well as for the less French bakewell tart. I make the dough in a food processor using very cold butter, and while it sounds like culinary heresy, I roll it out as soon as it’s made. Sandwiched between parchment or wax paper, the dough is a cinch to roll at this point — just make sure to chill it before you bake it (better yet, freeze it once it’s in the pan). I also like to partly bake the crust before I fill it, a step you can skip, but prebaking will give you a crisper bottom crust.
Ingredients
1 ½ cups/204 grams all-purpose flour
½ cup/60 grams confectioners’ sugar
¼ teaspoon fine sea salt
4 ½ ounces/128 grams very cold unsalted butter (1 stick plus 1 tablespoon), cut into small pieces
1 large egg yolk
Preparation
Put the flour, sugar and salt in a food processor, and pulse to blend. Scatter in the butter, and pulse about a dozen times, until the butter is cut in — you’ll have pieces the size of oatmeal flakes and others the size of peas. Stir the yolk to break it up and add it in 3 additions, pulsing after each. Pulse until the dough has curds and clumps; it should hold together when you pinch it.
Turn it out onto a counter, knead it into a compact ball and flatten it into a disk.
Roll the dough into an 11-inch circle between layers of parchment (or wax) paper. If it’s cold enough, fit it into a 9-to-9½-inch tart pan with a removable bottom, trimming the top even with the pan’s edges; if it’s not, chill it until you can work with it. Refrigerate the crust (in the pan) for at least 1 hour (or cover and freeze for up to 2 months).
Heat the oven to 400F. Place the pan on a baking sheet, and cover with a piece of buttered foil or parchment, pressing it lightly to cover the crust’s bottom and sides; fill with rice.
Bake for 20 minutes. Carefully remove the foil and rice. If you're going to bake the tart again with a filling, bake it uncovered for 5 minutes more. Cool for at least 30 minutes before filling.
Method for tart:
Cut the lemon into thin slices, and discard the seeds. Toss the slices and sugar into the bowl of a food processor, and whir for 3 minutes, scraping the bowl as needed, until smooth. With the machine running, add the eggs, one at a time, and then, when they’re incorporated, the cornstarch followed by the melted butter. Remove the bowl, and rap it against the counter a few times to pop some of the bubbles in the mixture. Pour the batter into the pre-cooked crust.
Bake the tart for 45 to 55 minutes, until the filling is puffed and lightly browned — don’t be concerned if the top cracks. If you tap the side of the pan, the filling should seem firm; if it jiggles just the least bit in the center, that’s fine. A toothpick poked into the center — be gentle — will come out clean. Transfer the tart on the baking sheet to a cooling rack. Leave until it reaches room temperature. The tart can be served now or chilled (it will keep in the refrigerator overnight).
Just before serving, dust the top with confectioners’ sugar, if desired.
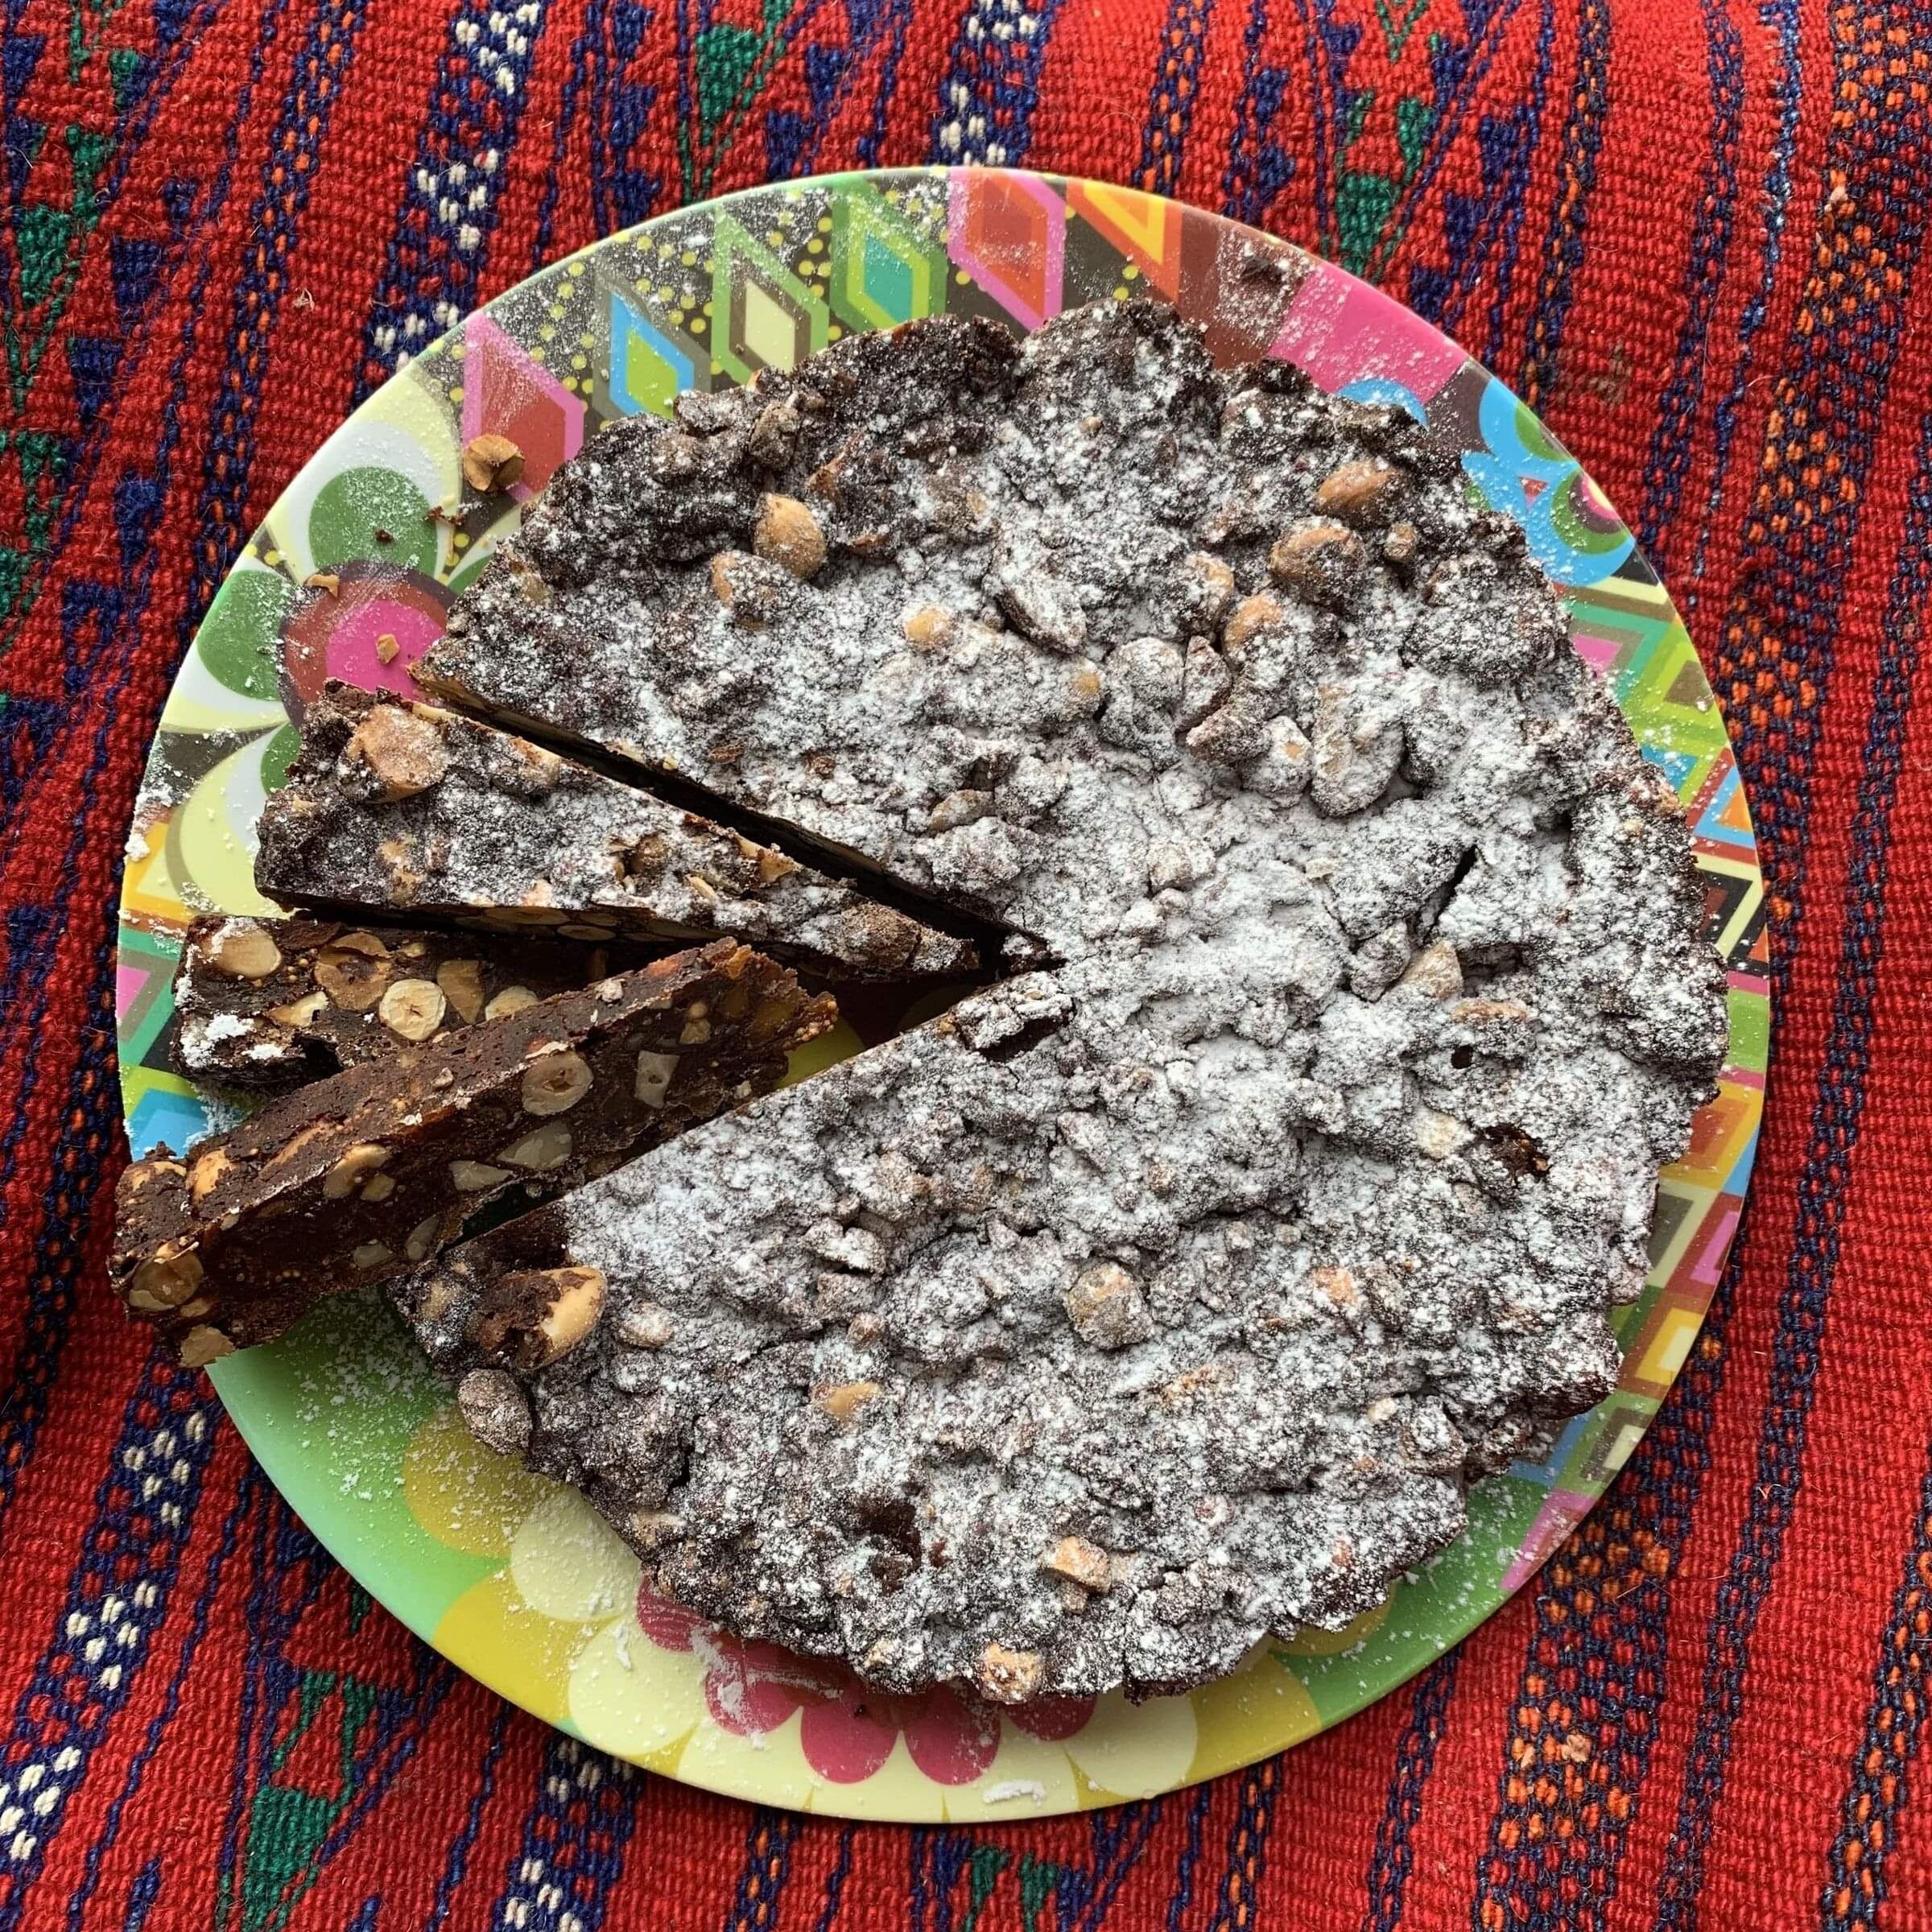
Siena Cake aka Panforte
Ingredients:
3/4 cup almonds (or replace with a combination of nuts: brazils or walnuts, for ex.)
1/4 cup hazelnuts
1/3 cup dried apricots (or replace with dried figs)
1/3 cup candied citrus peels (orange and lemon)
2/3 cup flour
2 tablespoons cocoa powder
1 1/2 teaspoon good ground cinnamon
1/2 tsp ground coriander
60 g dark chocolate
1/3 cup sugar
1/2 cup honey
icing sugar (for sprinkling)
Method:
1. Cut baking paper circle to fit bottom of 20cm well-buttered round cake pan, then butter the paper.
2. Preheat oven to 160c.
3. Chop almonds, hazelnuts, apricots, orange and lemon peel.
4. Mix well with flour, spices, and cocoa.
5. Melt chocolate and set aside to cool.
6. Put sugar and honey in a saucepan, stirring over medium heat until sugar is dissolved. Bring to a boil, then reduce heat and simmer for 5 minutes or until it reaches 115c.
7. Pour the melted sugar/honey mix over the nuts and fruit mix and stir well.
8. Press the batter into the pan and pat flat.
9. Bake for 35 minutes.
10. Let cool in pan.
11. Remove cake from pan, sprinkle with icing sugar (use a mesh sieve)
12. Wrap in foil or in a tin to preserve whole.
13. Or cut into thin wedges.
Note: Wrapped in aluminum foil or a tin to stay air-tight, it will keep for months (it will get progressively harder and drier in texture, refrigeration not needed.)
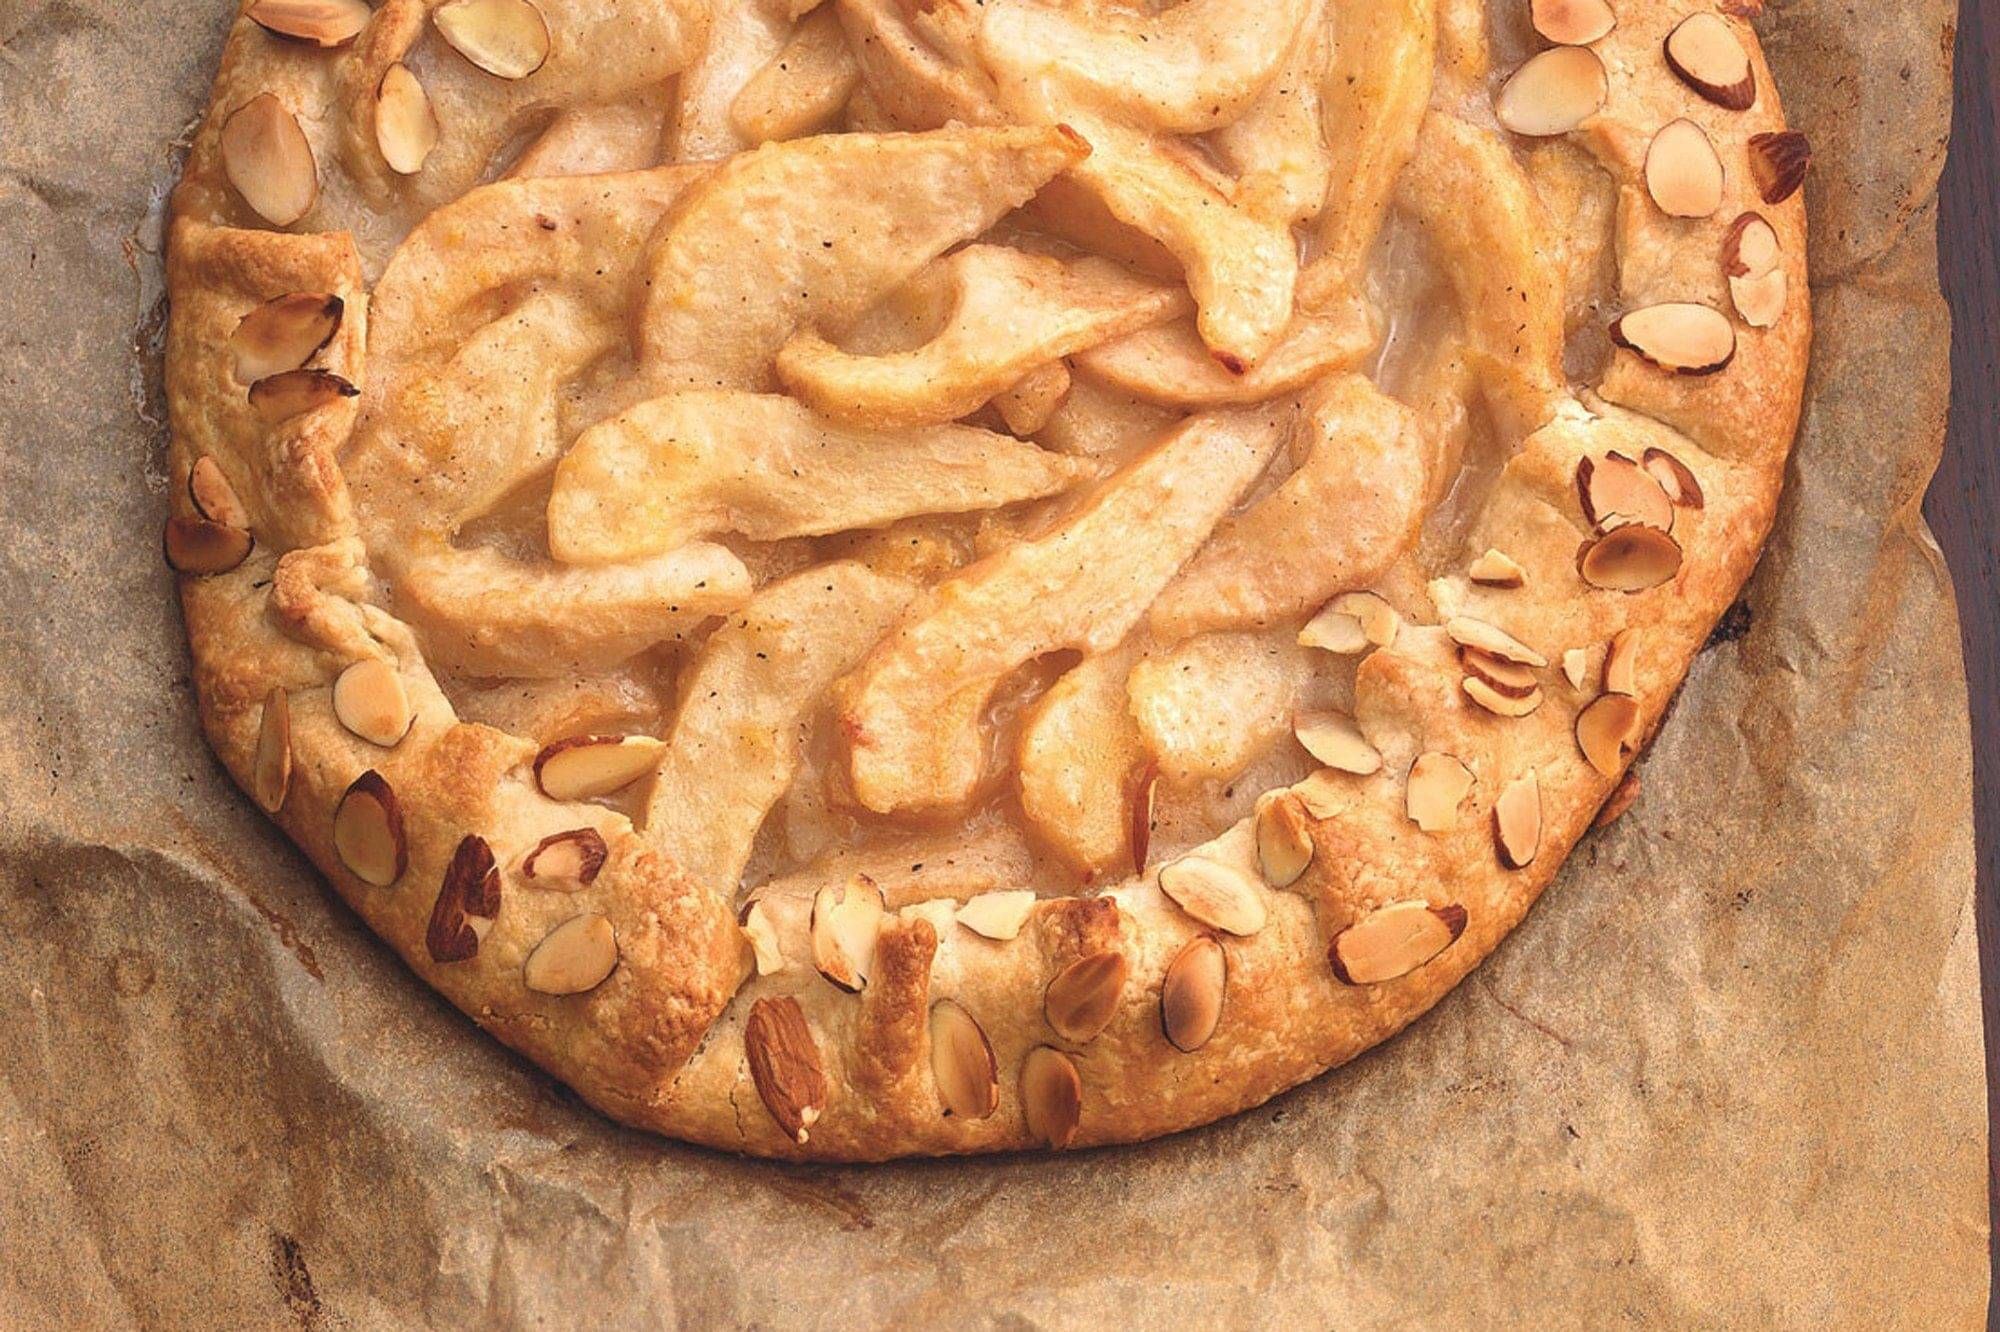
Rustic Pear Frangipane Galette
Free-Form Rustic Pear Galette with frangipane (makes 6 individual tartlets or one large)
Recipe from The Art of Cuisine, recipes of Toulouse Lautrec by Maurice Joyant, adapted by Chef Dr. Wendy Nolan Joyce
The advantage of a galette is that it's meant to be rustic so there's no need to worry about creating picture-perfect edges.
This pastry dough is a wonder! Easy to mix and roll, it bakes up sturdy yet flaky. I usually make my dough in a food processor. For the best results, don't cut the butter too small. Leave it in big, visible chunks—sugar-cube size is fine. You'll see streaks of butter when you gather the dough into a disk, but don't be alarmed. In the oven, those streaks of butter help to create light, flaky, buttery layers.
A layer of frangipane keeps the crust crisp by absorbing some of the fruits' juices.
PASTRY:
2-1/2 cups high grade flour
2 Tbs. sugar
1/2 tsp. salt
227g unsalted butter, cut into 1/2-inch pieces and chilled
2/3 cup ice water
FRANGIPANE:
1/2 tablespoon all-purpose flour, plus more for rolling dough
1/4 cup unsalted butter (1 stick)
1/4 cup granulated sugar
1/2 cup almond meal
1/2 large egg
Apricot jam
1/2 T vanilla extract or rhum
Egg wash
2 pears peeled and sliced plus sugar for sprinkling
METHOD:
For the frangipane: In a clean food processor, cream butter and sugar in the bowl until light and fluffy. Add egg, ground almonds, rum or extract, and flour; beat until smooth. Set aside in fridge until ready to use.
For the crust: In a clean food processor, combine the flour, sugar and salt, Pulse 5-6 times.
Add the cubed cold butter and pulse until mixture has small pebble-like pieces.
Add the ice water all at once to the flour and butter. Mix the dough just until it begins to come together (if using a stand mixer or a food processor, be especially careful not to overmix the dough). Gather the dough with your hands -- don't worry if you see streaks of butter -- and shape it into two disks. Wrap the disks in plastic and refrigerate for at least 1/2 hour or overnight.
Preheat oven to 180 degrees C and line two baking sheets with parchment paper.
Roll out dough on a lightly floured surface. Using a template, cut into 6 rounds or one large round.
Transfer to the baking sheet and refrigerate 15 minutes or, if the dough isn’t too soft, make the tarts right away.
ASSEMBLE:
Spread the preserves on the pastry rounds, leaving about a 1-inch border. Spread the frangipane over the apricot preserves.
Arrange the pear slices on top, fanning the pear slices in a circular design.
Fold the pastry up and over the fruit.
Brush with egg wash over the pastry and then sprinkle with the raw sugar.
Bake the galettes for 30 to 40 minutes, rotating the baking sheets halfway through the baking time. The galettes are finished when the crusts are brown and the frangipane is puffed.

Apple Plum Crumble (Vegan/Gluten-free/low sugar)
I adapted this recipe from a friend's vegan crumble recipe to make it more suitable for a diabetic (I used stevia instead of sugar, as per below). The ingredients are gluten-free, healthy and delicious! You can use other stone fruits if you don't have plums though I really like the sour flavour of the plums and the way it complements the apple.
Ingredients
Crumble base and topping:
1 cup oats
½ cup almond meal
50g or ½ cup coconut sugar (or replace with ½ tsp stevia for lower sugar: conversion rate: 100g sugar=1 cup sugar=1 tsp stevia)
40g tapioca flour or arrowroot flour
40g coconut oil (I used the kind that solidifies when cold, so heated it a bit to soften in the microwave, then scooped it semi-hard straight into the dry mixture in food processor)
1 tsp vanilla extract
1 tsp cinnamon + whatever other spices you like (nutmeg, 5-spice, cloves..)
Filling:
550 g apples, cored and sliced; I add some freshly squeezed lemon juice to the apples to keep them from browning
450 g plums, pitted and sliced
75 g coconut sugar (or 1 ½ tsp stevia)
2 tablespoons cornflour/corn starch or arrowroot flour
1 tsp vanilla extract
½ tsp cinnamon
Preheat oven to 180c.
Method:
1. First make the crumble mix. Place dry ingredients in the food processor and mix till combined.
2. Add coconut oil and vanilla and mix till it’s crumbly and combined
3. Grease a 15x23cm pan with coconut oil
4. Pour 1/3 of the crumble mix into the bottom of the pan. Bake for 5-8 minutes until the crumble starts to look a bit brown and dry. Remove from oven and cool.
5. Make the filling: put fruits and other ingredients in a large bowl. Stir until combined.
6. Pour the filling onto the cooled base. Top with the rest of the crumble mix.
7. Return to oven for 30 minutes or until the topping is nicely browned. Enjoy on its own or with vanilla yoghurt or ice cream (or vegan alternative).
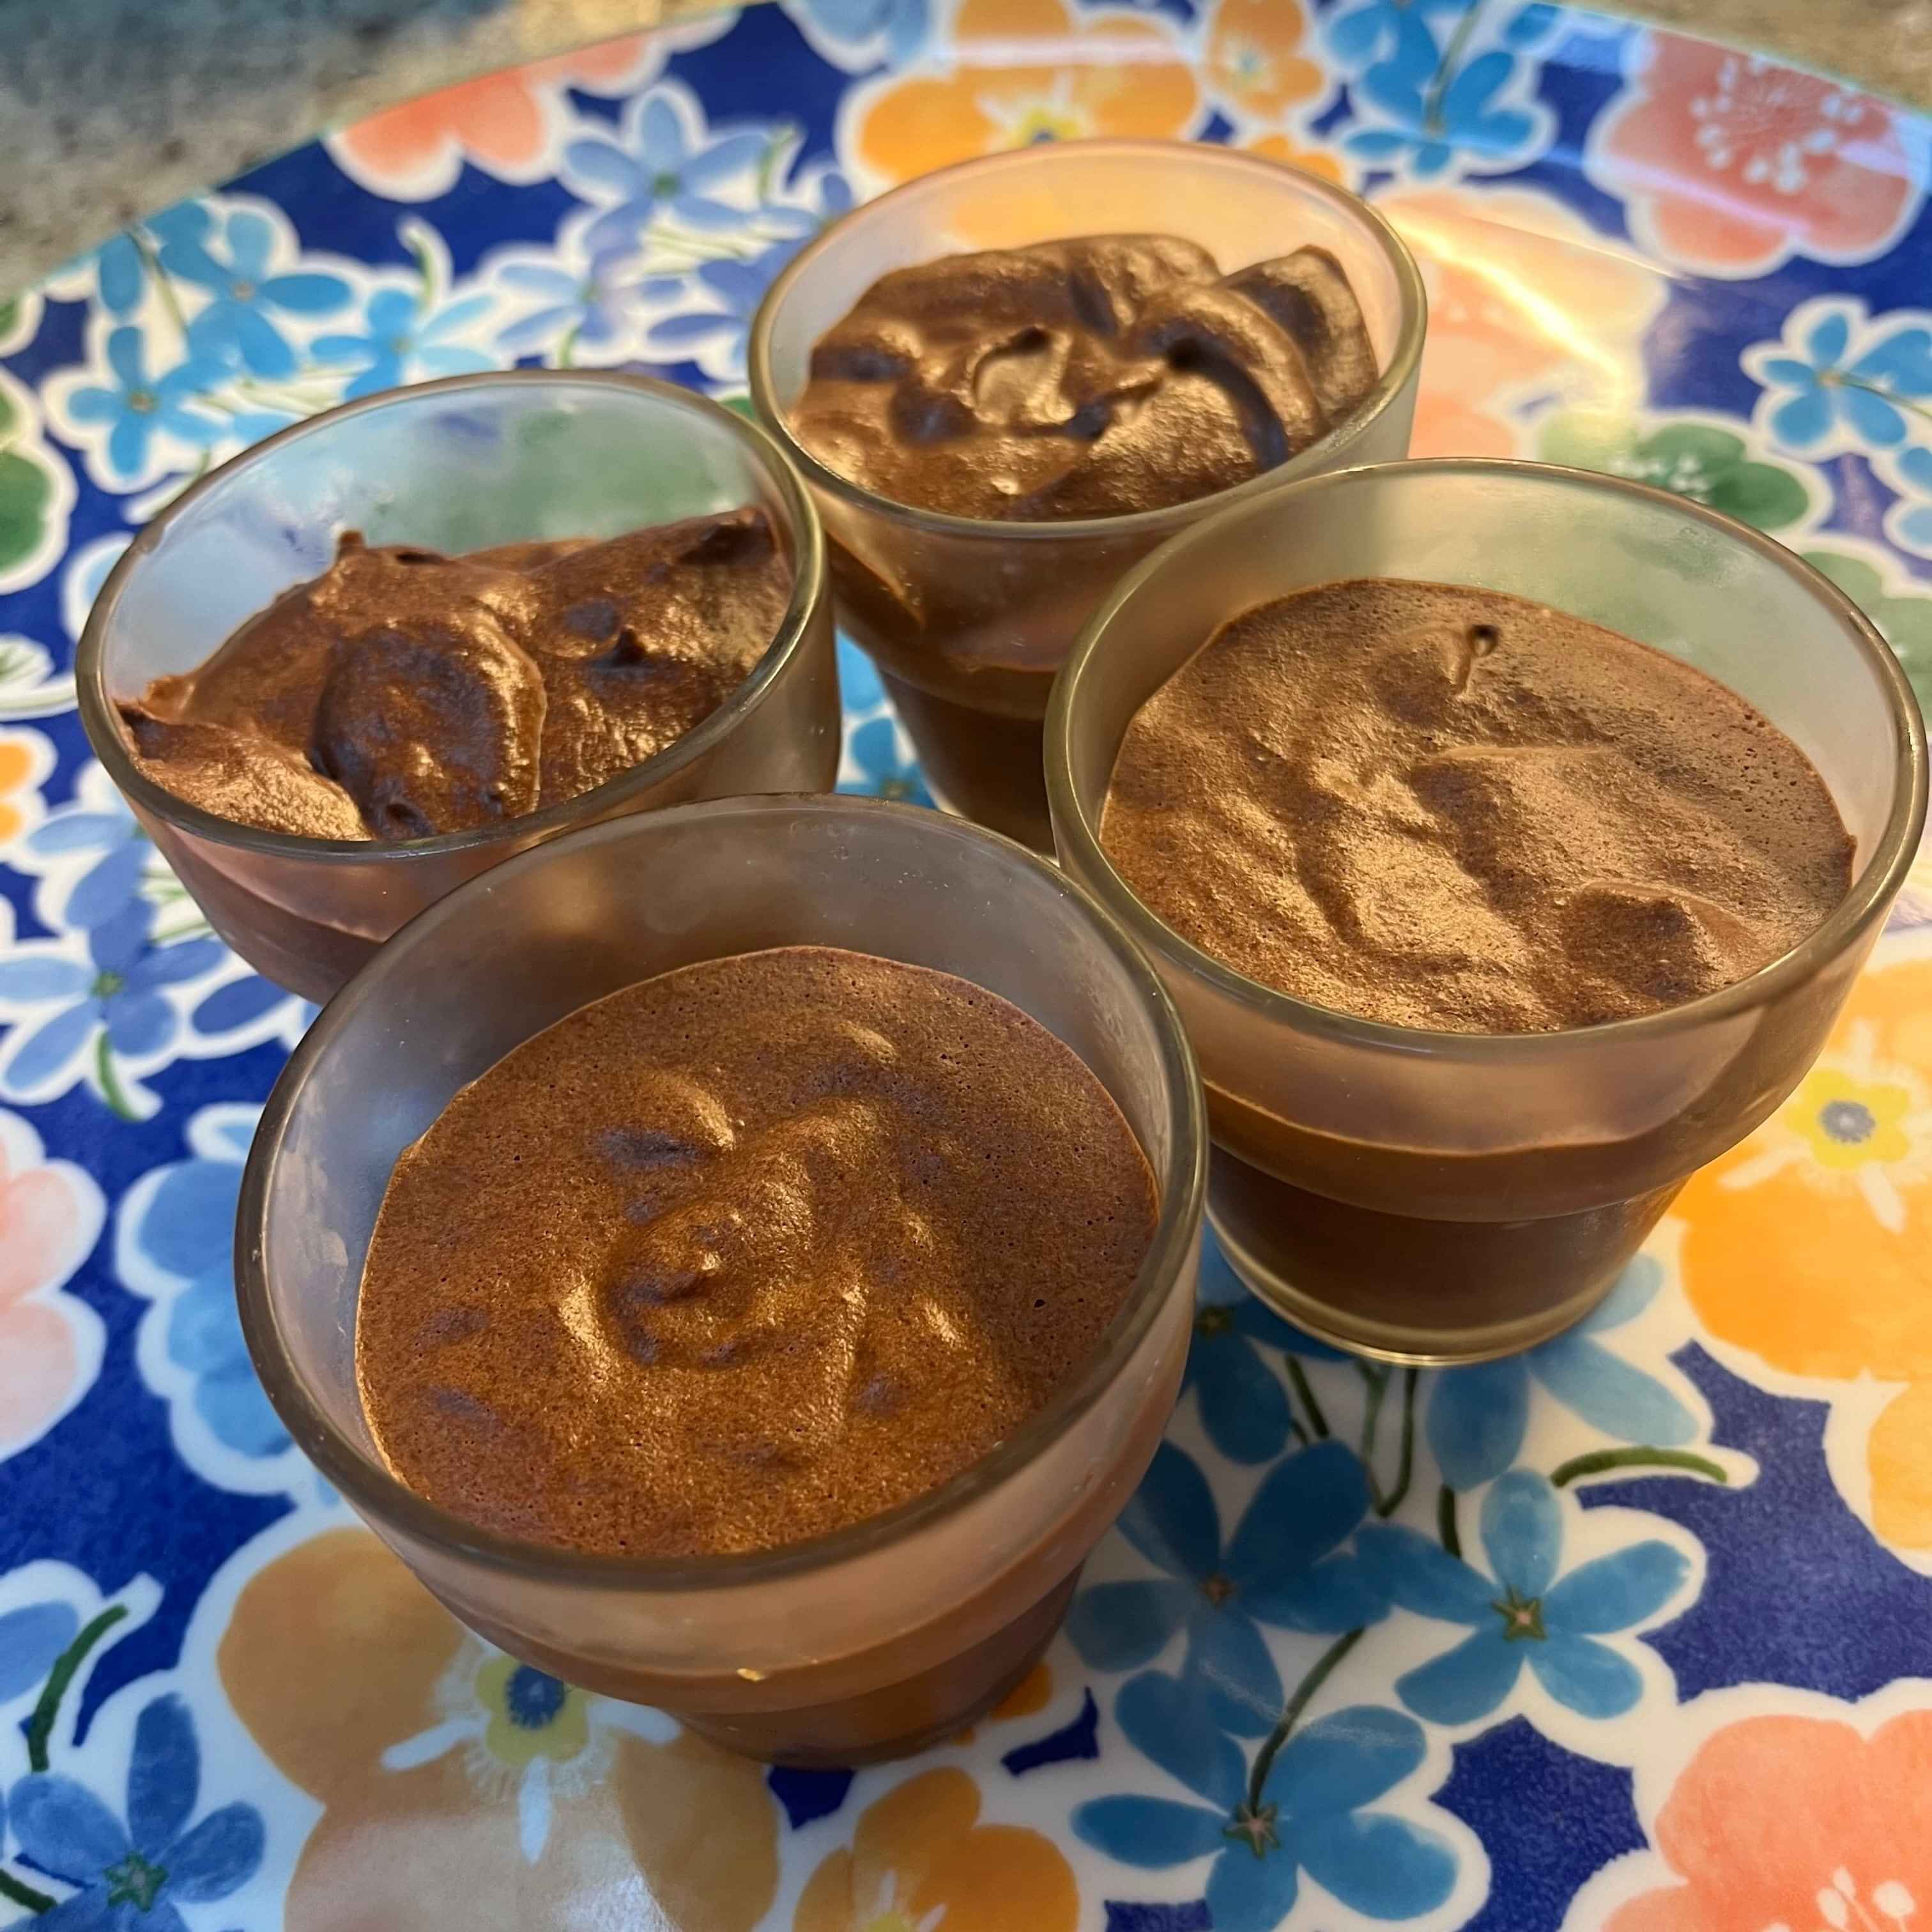
Chocolate mousse (Vegan/Gluten-free/low sugar)
What's not to love?! It's plant-based, uses healthy ingredients (well, there's a tiny bit of sugar), easy and delicious.
Ingredients
INGREDIENTS
¾ cup / 180 ml (room temp) aquafaba (from low-sodium canned chickpeas OR home cooked)
1 tsp lemon/lime juice or scant ½ tsp cream of tartar
140 g / 5 oz dark 70% cacao vegan chocolate
10 g / 2 tsp coconut oil (to help with chocolate seizing)
25 g / 2 tbsp caster (superfine) sugar (optional, adjust to taste)
1 tsp vanilla
pinch salt
GARNISH (optional)
1 tbsp chocolate shavings
raspberry powder
Method:
1. Make sure you have a clean bowl with no trace of oil in it. I like to wipe my kitchenaid bowl with lemon first.
2. Add aquafaba and tartar and whip till stiff. It's easiest to use a whisk attachment.
3. Once you reach stiff peaks, start adding sugar, bit by bit, whipping the whole time. If sugar has caused the stiff peaks to perish, whip the mixture until you get stiff peaks again. Caster (also known as superfine) sugar or icing sugar work well, other sugars are known to make aquafaba deflate. Add vanilla.
4. Meanwhile, in double boiler, melt the chocolate and coconut oil. Add salt. Cool. Gently fold cooled chocolate into the aquafaba. The fluffy whites will sink; that's ok. Pour into nice jars or whatever you want to serve the mousse in. Refrigerate. Decorate before serving.
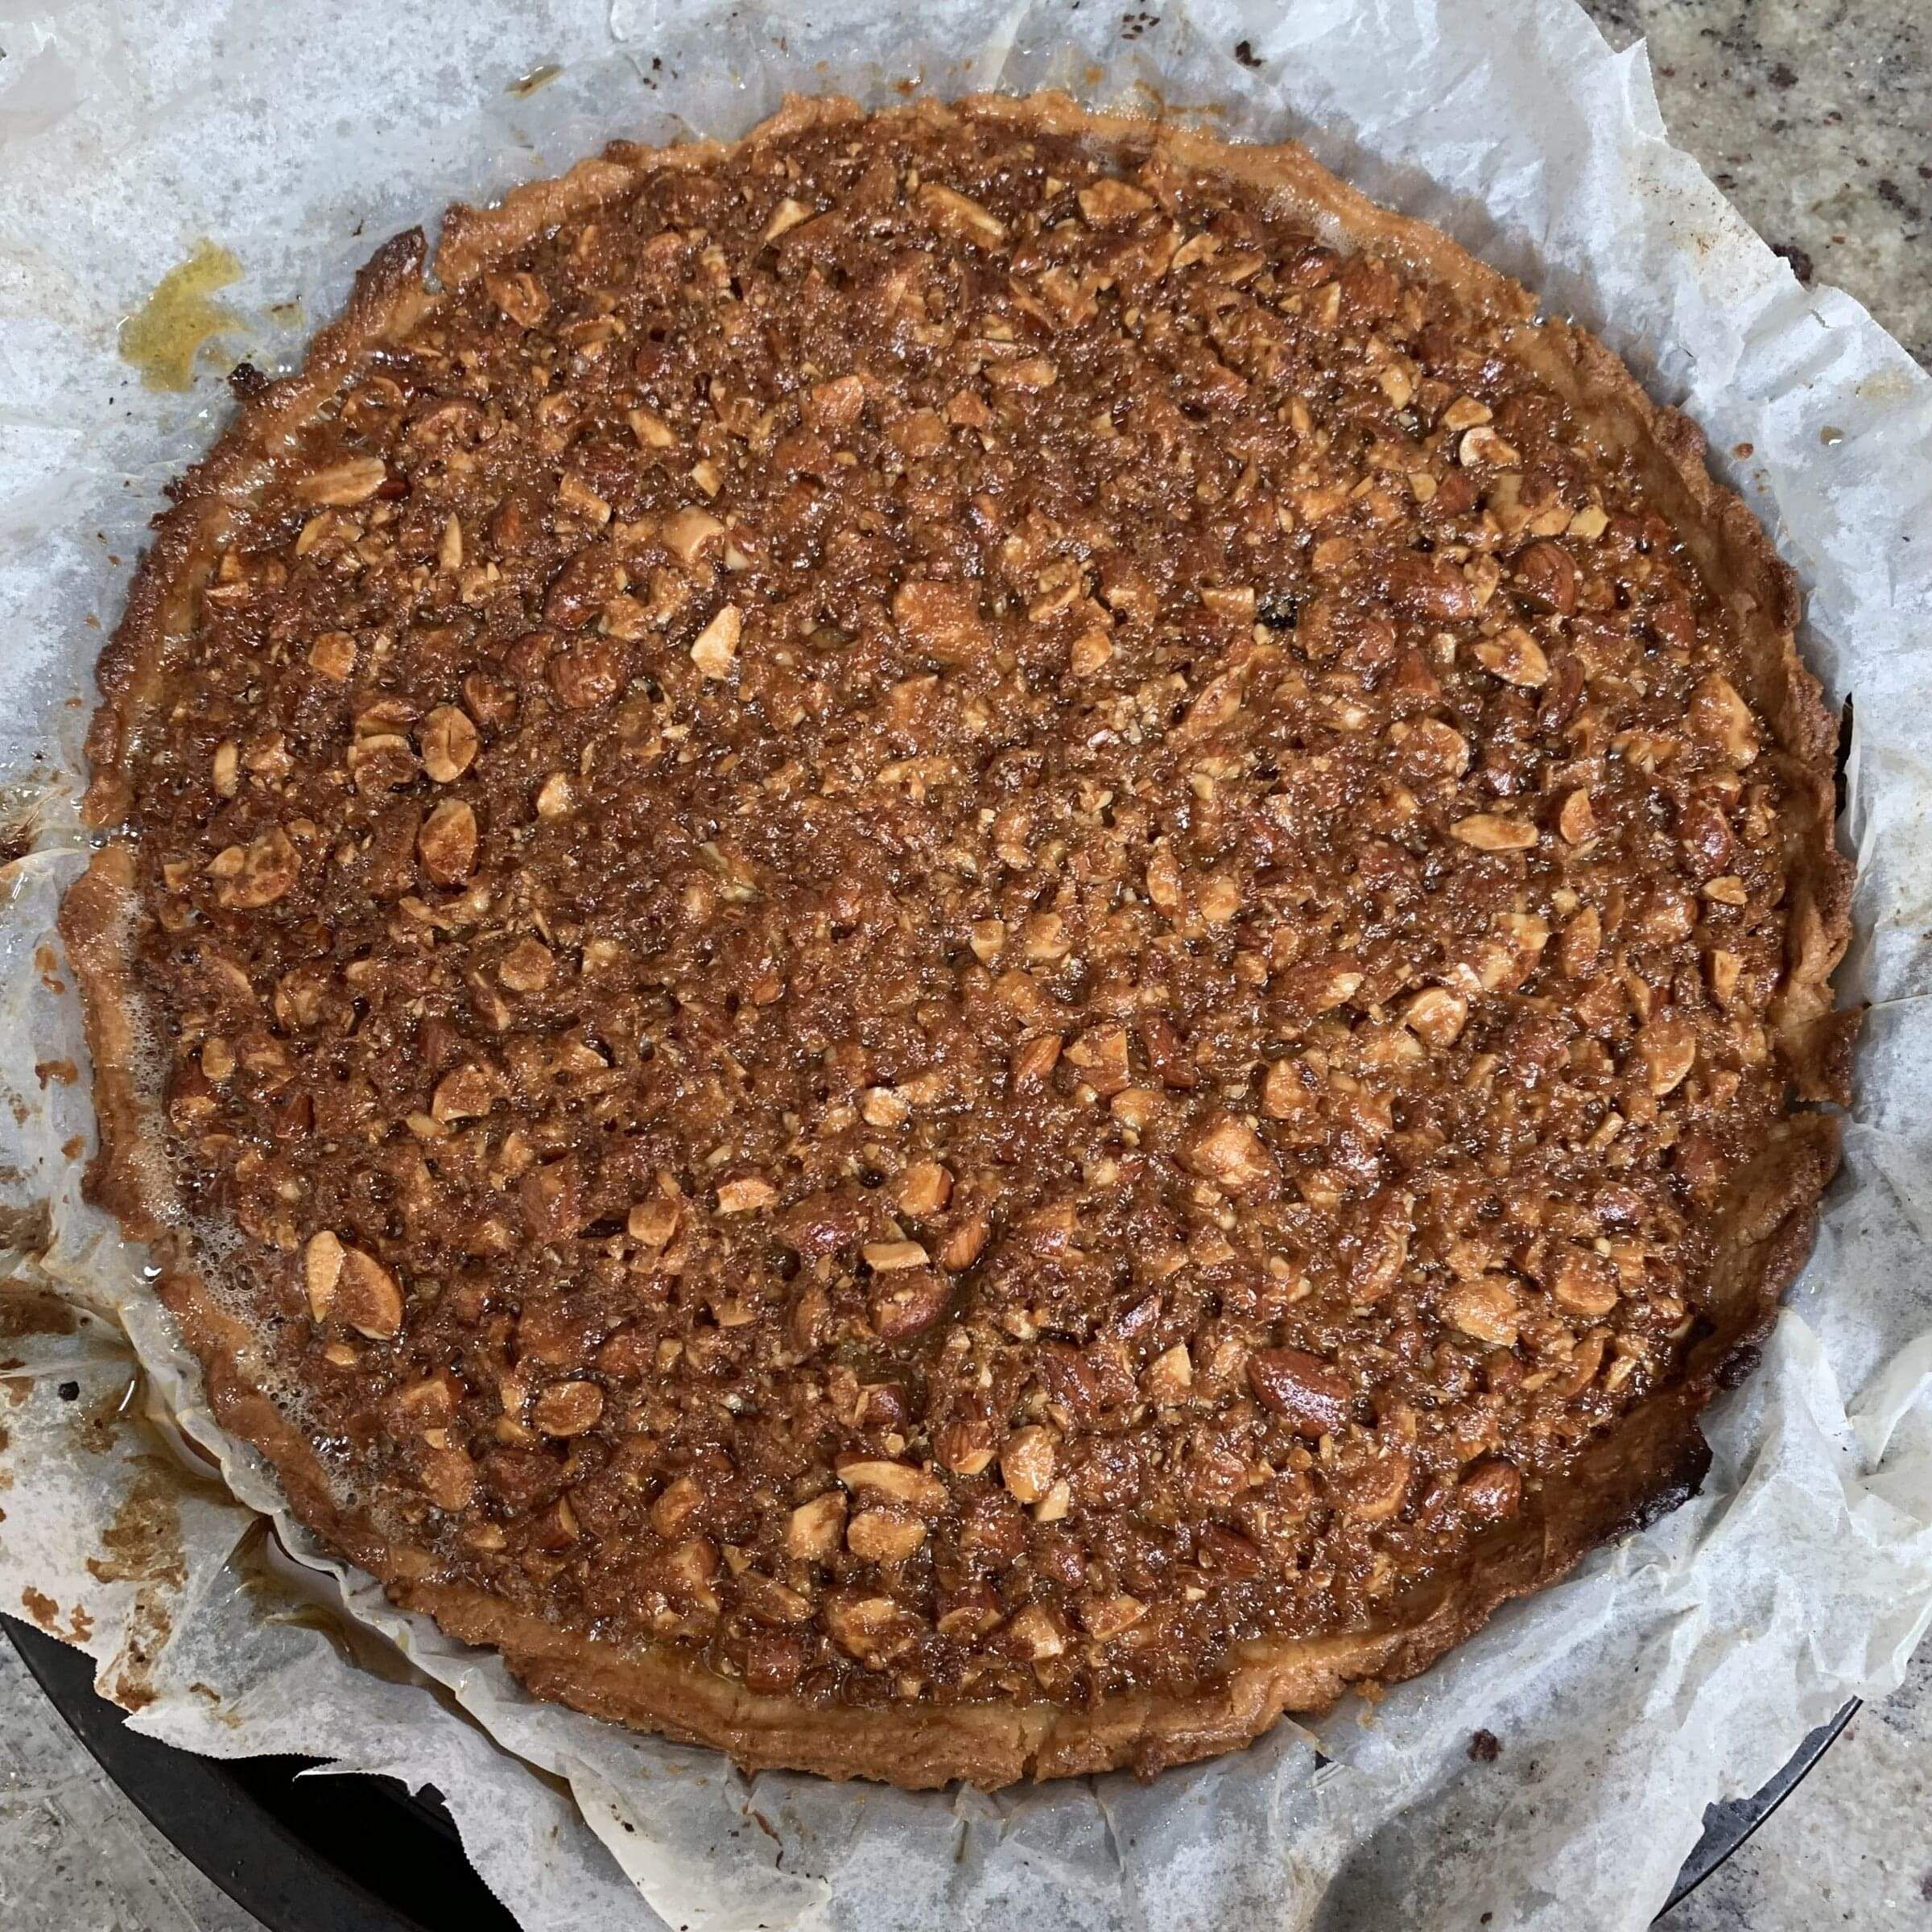
Salted Caramel Nut Tart
This recipe is adapted from an excellent tart in the recent Dish magazine (page 102-4 in the Sept 2021 issue). I’ve only tweaked a few things from the original recipe (adding a homemade crust and cutting down the sugar slightly) but the original recipe is stunning too.
It’s chewy, nutty, buttery and delicious with vanilla ice cream! The filling reminds me of my mom’s famous Thanksgiving pecan pies. I’ve used a fool-proof homemade tart crust dough that works for so many different sweet tarts.
Preheat oven to 200c. (Or 180 fan bake). You’ll need raw rice or pastry weights to blind bake.
Crust:
1.5 cups flour
60 g icing sugar
Pinch salt
128 g cold cubed unsalted butter
1 large egg yolk
Ice water
Crust method:
1. In a food processor, add dry ingredients and butter gradually and mix until you get a sandy texture. Add egg and enough water to just bind the dough.
2. Turn dough out on baking paper, wrap and refrigerate for a few hours or overnight.
3. Roll the dough into a circle large enough to fill a 22cm loose-based tart tin (I do this between two sheets of baking paper so dough doesn’t stick to the rolling pin or the tart tin.) Tuck the dough neatly around the rim.
4. Blind bake until the dough has lost its shiny raw look. In my oven this took 10 minutes but every oven is different so I advise to check after 8-15 minutes. Tip: I peak under the weighted baking paper and when the base is no longer raw, I take off the weights and paper and bake a further minute.
5. Remove crust from oven and cool. Turn oven to 160c fan bake and place an oven tray in oven to preheat. You’ll bake the tart on this in its tart tin. Make filling.
Filling:
1/4 cup brown sugar
1/4 cup golden syrup
1 tsp vanilla
100 g butter
1/2 cup cream
Filling method:
1. In saucepan, melt the above ingredients, bring to boil, stir to dissolve sugar. Simmer 3 minutes. Cool completely. (I did this step the day before and let it sit out till cool.)
2. Add 1 egg, 3/4 t salt, and 200g roasted chopped nuts. Almonds, pecans or walnuts work well.
3. Pour filling into cooled crust. Slide into oven onto heated tray.
4. Bake for 25-30 minutes until the filling is bubbling. Cover any areas that are browning too quickly with foil. Remove from oven.
5. Allow to cool completely before eating (we couldn’t wait though and had a piece when still partially warm and were impressed that the filling set pretty quickly).
Enjoy! (We had it with vanilla ice cream-yum!) Let us know if you make it and how it goes.
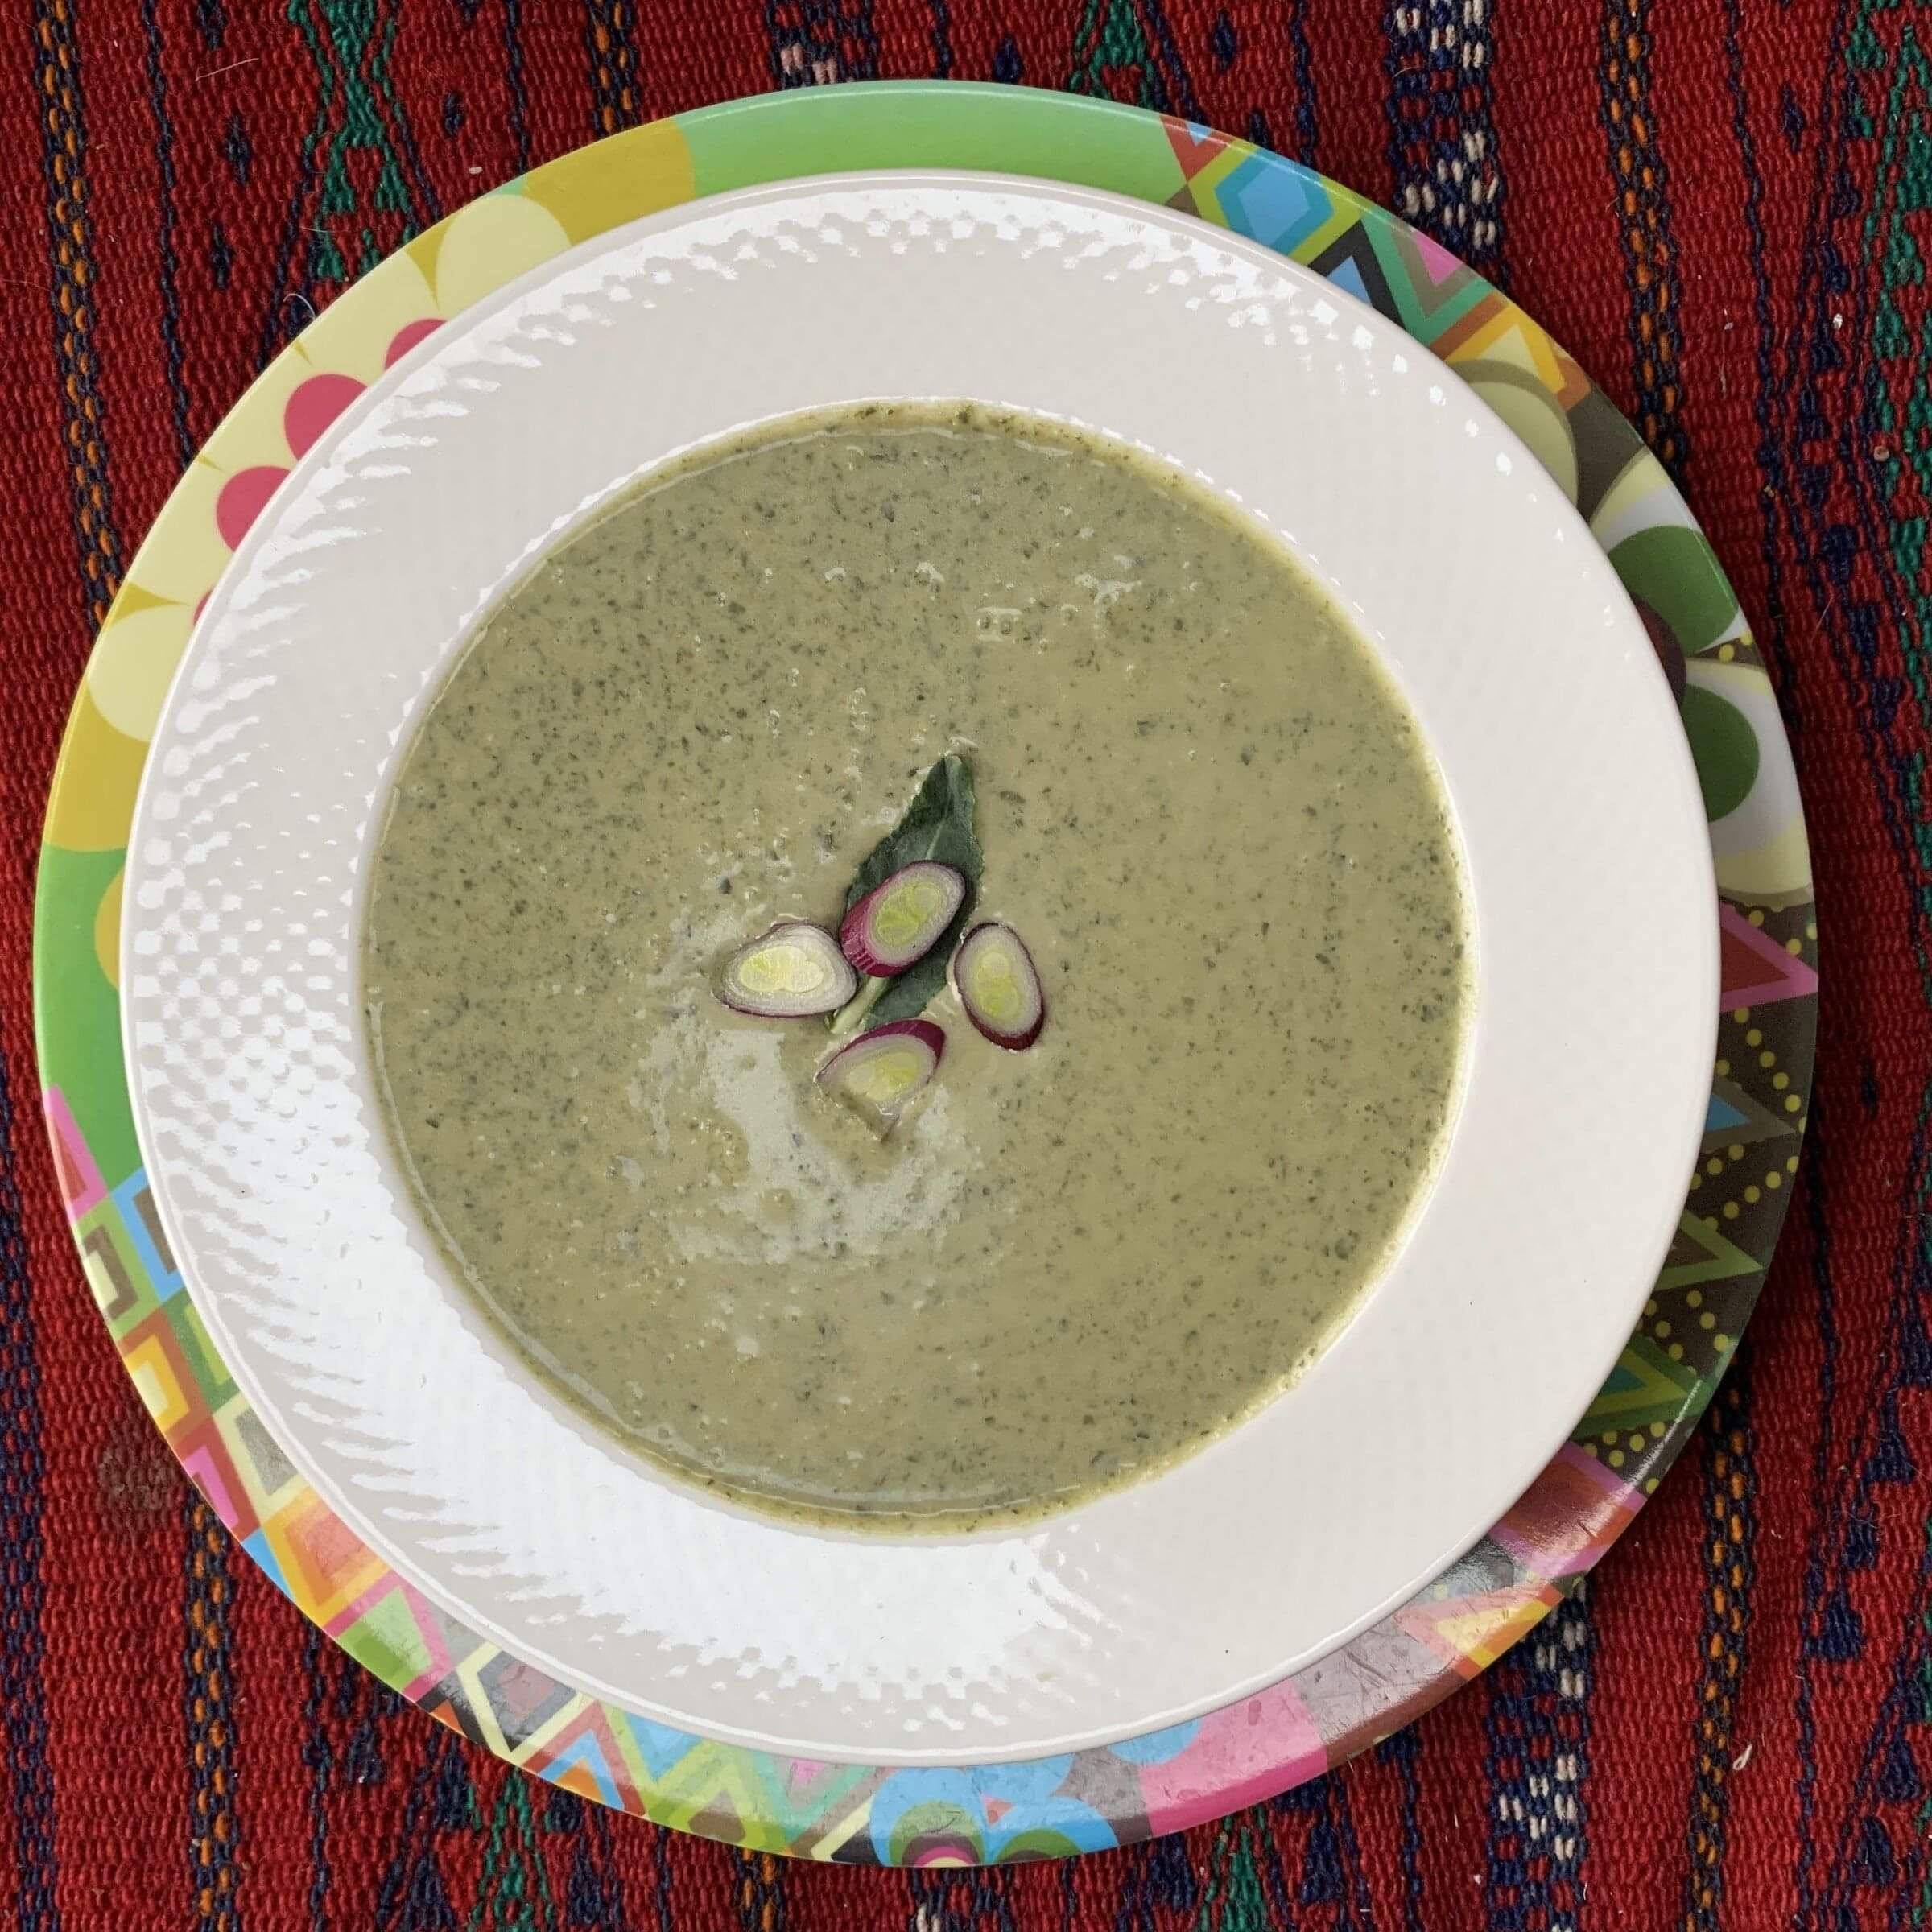
Silverbeet Broccoli Soup (vegan + gluten free)
This recipe was inspired by a few different green soups I’ve made over the past few years. I’ve chosen it because it’s hearty, healthy, warming and uses ingredients that are easy to source in Wellington (plus I’ve got lots of leek and silverbeet in the garden so I wanted to use those), and it’s entirely plant-based. Instead of using chicken stock, I’ve made a mushroom kombu seaweed stock that adds nutrients and an excellent flavour base. The coconut cream adds a silky creaminess. Yum!
If you’d like to give it a Middle Eastern flair, there’s an excellent broccoli soup that inspired this one in Food of the Southern Forests by Sophie Zalokar, © 2014. She tops her soup with a tahini, lemon and pine nut za’atar that would work well on top on this soup. For copyright reasons, I’m not reprinting that here, but you can google it and find the recipe. I’ve included my recipe for za’atar below which would be a nice finish sprinkled on top with a swirl of coconut cream.
Serves 4
1 leek, roughly chopped
3 cloves garlic, roughly chopped
1 teaspoon sea salt
1 teaspoon ground cumin
2 tablespoons olive oil
1 whole head broccoli, head + stems trimmed of tougher bits, then the whole thing roughly chopped. *TIP: chopping the broccoli up a half hour before you cook it and leaving it to rest releases the cancer-fighting enzyme myrosinase. According to nutritionist Sue Radd, PhD (Food As Medicine, 2021), myrosinase is 'fenced within the cells of cruciferous vegetables. So you need to first chew or chop these veggies for myrosinase to be released...This needs to occur before cooking as myrosinase is progressively destroyed by heat. However, once the individual anti-cancer phytonutrients...are formed, they are heat-resistant and can withstand cooking.' (p. 375)
1 litre (4 cups) mushroom kombu stock (recipe below) or vegetable stock
1 x 400ml can coconut cream
1 large bunch of silverbeet or spinach leaves, stalks trimmed off
2 tablespoons za’atar
METHOD
1. In a good soup pot (I use a heavy creuset or a nice weighty copper saucepan that prevents burning and allows for simmering), gently fry the leek and garlic, together with a teaspoon of salt and the ground cumin, in the olive oil until soft.
2. Stir through the broccoli and then add the stock. Simmer for 10-15 minutes until the broccoli is soft. Add the silverbeet leaves to wilt.
3. Puree together with the coconut cream until smooth and season to taste with salt and freshly ground pepper.
4. Garnish with a swirl of coconut cream and za’atar.
Mushroom Kombu Stock
Pour 2 litres of water in a stock pot. Add 25 g dried shitake mushrooms (or any mushrooms you have) along with some kombu seaweed and three spring onions. I also add the silverbeet stems and dark green leaves from the top of the leek. Bring to a boil, reduce heat, and simmer for 20-30 minutes. Allow to sit for a while if you have time, then strain the liquid and discard the solids.
Za’atar
Za’atar is a Middle Eastern spice mix of dried thyme, oregano, sesame and sumac that mimics the flavours of the hyssop plant that is native to the Mediterranean.
At Savour, we grow the herbs, dehydrate them, and whizz all the ingredients in a food processor using a recipe adapted from Sababa by Adeena Sussman, my favourite Israeli cookbook. We store the extra in glass jars and it keeps well for months, and can be sprinkled on roasts, flatbreads, labne, hummus. You can buy premade za’atar at specialist shops.
Tips from Sussman: 'There are different styles of za’atar all over the Middle East; some are much tangier due to the amount of sumac added; some have more sesame seeds or salt. I found making my own to be a revelation, because I could control exactly how much of each element I wanted in the mix. Microwaving herbs to dry them is another discovery; it removes the moisture while leaving the herbs bright green.'
1 cup fresh oregano leaves, or 6 T dried
3 T dried marjoram
3 T sesame seeds
4 t dried thyme
1 T sumac
1 t salt
Method: If using fresh oregano, arrange it on a towel-lined plate and microwave in 15-second intervals, stirring between intervals, until dry and crumbly, 2 to 2½ minutes. Crumble the leaves by hand or in a spice grinder until almost fine then add marjoram, sesame seeds, thyme, sumac, and salt and grind up until it reaches a texture you like. Store in an airtight container for up to 3 months.
Some super health benefits of the ingredients in this soup:
Silverbeet: great source of iron, vitamins K, A and C and calcium
Broccoli: see note above
Sumac: Rich in antioxidants, sumac has also been shown to improve blood sugar levels in people with diabetes
Oregano: Contains several antioxidants with anti-inflammatory, blood sugar and blood-fat lowering properties. It's one of the richest sources of polyphenols among herbs.
Kombu Seaweed: rich in iodine, important for your thyroid
Mushrooms (if using mushroom stock): excellent source of vitamin D, mushrooms also contain some unique phytonutrients that might boost immunity by encouraging a greater diversity of microbiota in your gut. Mushrooms might also help with autoimmune diseases such as rheumatoid arthritis and have anti-inflammatory properties.
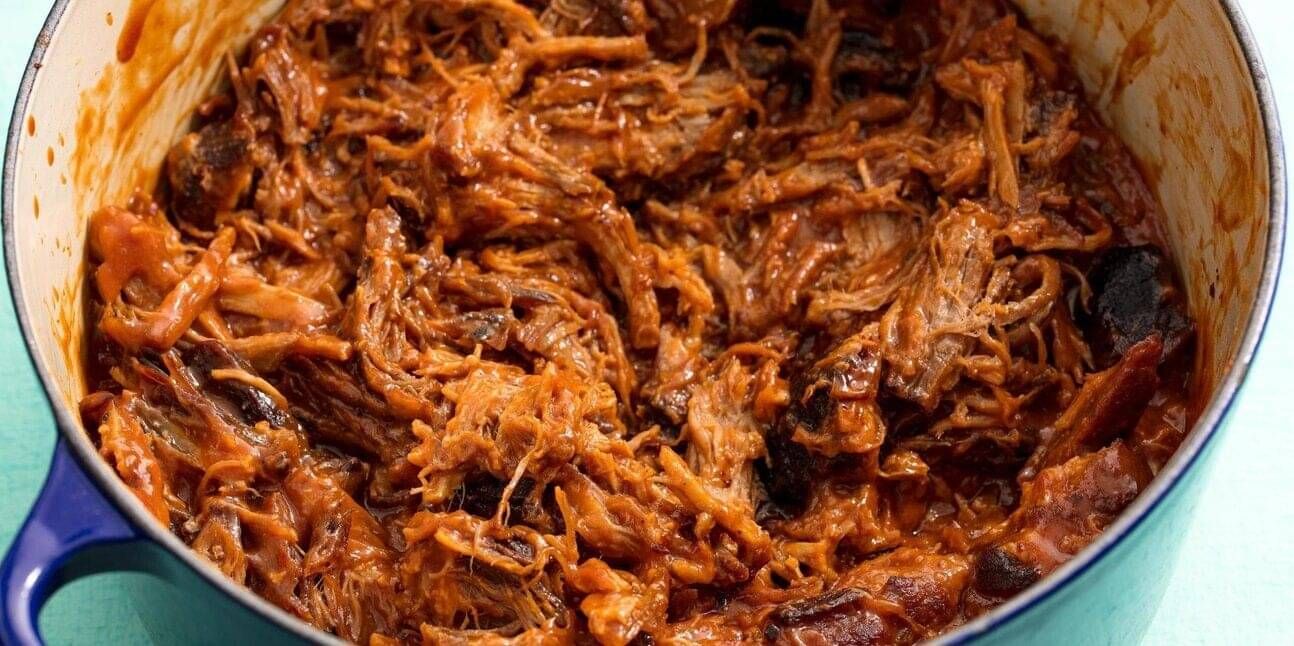
Texas Pulled Pork
If you love a super easy, deliciously fatty shredded pork recipe in lots of juice, this one's for you!
As a girl growing up mostly in the United States (and in the South for 3 years), I spent a lot of weekends enjoying barbeques with my extended family or being taken along to church picnics that seemed to last all day with hotdogs, potato salad, sloppy Joes--a sort of pulled pork sandwich served with butter on a burger bun. This recipe is even better than the meat served at those childhood picnics. Perfect for Autumn hibernation!
Ingredients:
1 teaspoon vegetable oil
1 (4 pound) pork shoulder roast
1 cup barbeque sauce
½ cup apple cider vinegar
½ cup chicken broth
¼ cup light brown sugar
1 tablespoon yellow mustard
1 tablespoon Worcestershire sauce
1 tablespoon chili powder
1 extra large onion, chopped
2 large cloves garlic, crushed
1 T fresh thyme leaves or 1½ teaspoons dried thyme
8 hamburger buns, split
2 tablespoons butter, or as needed
Method:
1. Pour the vegetable oil into the bottom of a slow cooker. Place the pork roast into the slow cooker; pour in the barbecue sauce, apple cider vinegar, and chicken broth. Stir in the brown sugar, yellow mustard, Worcestershire sauce, chili powder, onion, garlic, and thyme. Cover and cook on High until the roast shreds easily with a fork, 5 to 6 hours.
2. Remove the roast from the slow cooker, and shred the meat using two forks. Return the shredded pork to the slow cooker, and stir the meat into the juices.
3. Spread the inside of both halves of hamburger buns with butter. Toast the buns, butter side down, in a skillet over medium heat until golden brown. Spoon pork into the toasted buns.
Recipe adapted from Allrecipes source :
Thanks for checking out my recipe page! Wendy
wendy@savour.org.nz | (64) 022 077 4651
Sign up for Savour™ Cooking School news and discounts on cooking classes

Workshops and private functions are run either from Wendy's kitchen & garden in Wadestown, Wellington, or at our large commercial kitchen in Linden, Tawa, Wellington:
SSC Hospitality
17 Collins Ave. Tawa, Wellington, 5028
We proudly support Canteen Aotearoa, Mary Potter Hospice, NZ Red Cross, Women’s Refuge, and Seeds to Feeds.